


Pumpkin Carving Party Ideas: The Ultimate Guide to a Glowing Autumn Night

Every October, the same dilemma plays out in kitchens across the country: who actually wants to spend forty-five minutes hunched over a newspaper-covered table scraping the inside of a pumpkin with a spoon? Most adults abandon the project after carving one toothy grin. Kids want to participate but lose interest the moment the goo gets involved. Husbands and wives argue about how much pumpkin guts end up on the floor. By the end of the night, exactly two of the six pumpkins you bought have faces, the kitchen trash bag is leaking orange slime, and your hands smell vaguely of squash no matter how many times you wash them.
It does not have to be this way. A pumpkin carving party — when properly planned — is one of the most fun, seasonal, and genuinely creative gatherings you can throw in the fall. It scales from a family night to a classroom event to a full-blown adult Halloween pregame, costs far less than most parties, and produces a tangible decoration that lasts for weeks. This guide walks you through every detail: tools and pumpkin selection, carving techniques for every skill level, food that complements the activity, games to keep the energy high, a stress-free weekend timeline, real budgets, and answers to the most common questions. Browse our Halloween party supplies collection for themed plates, cups, and table runners, and our fall party plates and napkins for warm-toned autumn tableware that pairs beautifully with carved pumpkins.
The Tools and Materials That Actually Matter
The single most common mistake hosts make is buying a flimsy $5 carving kit from a big-box store. The serrated saws bend, snap, and make jagged cuts. The plastic scoops bend in half when they hit a thick pumpkin wall. You end up with frustrated guests, broken tools, and a mess. Spend a little more for proper equipment and the night transforms.
Carving Kit Essentials
- Sturdy serrated saws: look for metal-handled ones with replaceable blades. Brands like Cricut, Midwest Tool, or any heavy-duty option work. Buy one per two guests, plus a few spares.
- Loop and detail knives: for fine carving — small pokers for outlining patterns, ribbon tools for shaving gourds down to skin level.
- Scoops and scrapers: a metal ice cream scoop, a heavy-duty plastic scraper, and a paring knife for stubborn bits. Buy at least one scoop per two people.
- Pokers and pattern tools: a pumpkin poker (a sharp nail on a stick) lets you transfer printed patterns by tracing dots.
- Battery tealights: a couple dozen battery-operated tealights are safer than real candles, last all night, and let even kids light their carved pumpkins.
- Newspaper or kraft paper: protect your table by covering it completely before any carving starts.
Pumpkin Selection — How to Buy Pumpkins That Actually Carve Well
Walk into any pumpkin patch in October and you'll see hundreds of orange spheres. They are not all equal.
- Size matters: medium pumpkins (10–15 pounds, roughly 9–12 inches tall) are easier to handle and carve than large ones. They are also easier for kids to manage. Save the giant 30-pound pumpkins for the "stack of three" front-porch display or an adult face-carving challenge.
- Look for a flat bottom: the pumpkin will sit upright on a porch or table for weeks after carving. Round bottoms rock and lean.
- Tap-test: a ripe pumpkin sounds hollow when you tap it. If it sounds dense, the wall will be thick — good for carving but harder to gut.
- Check for soft spots and bruises: pumpkins rot from the inside out, and a soft spot means that pumpkin is already on its way out. Skip it.
- Stem integrity: a green, intact stem keeps the pumpkin fresh longer. Broken stems invite mold into the top.
- Color: deep orange pumpkins carve well but photograph yellow. White and grey pumpkins (Cinderella, Lumina, Blue Doll varieties) are striking on a fall table but harder to see in low light.
Pro tip: avoid pumpkins that have been out in the rain for days. They absorb water through the stem and develop invisible mold at the crown. Buy your pumpkins 3–7 days before carving to ensure they are dry and have time to cure — the rind hardens slightly, which extends shelf life.
Carving Styles for Every Skill Level
Not every guest at your party will be a sculptor. Plan for three skill tiers so everyone can find a level they're comfortable with.
Beginner — Tooth and Triangle Faces
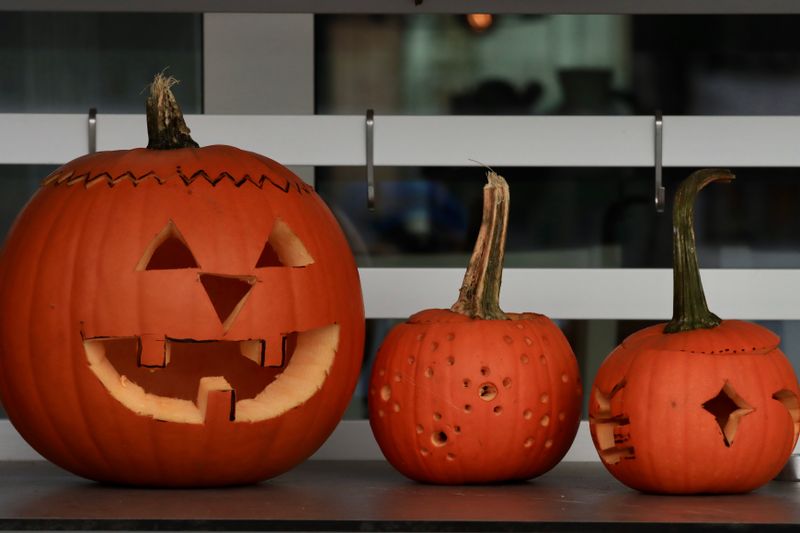
The classic beginner pumpkin: a triangular eye, a jagged toothy grin, a stem for a nose. Cut a circle around the stem at least 5 inches wide — that's the cleaning hatch. Scoop out all guts. Draw eyes and a mouth with a marker. Saw along the lines. Pop out the pieces. Done.
For kids or absolute beginners, pre-cut kits with stamped paper patterns and pre-poked holes are cheap and build confidence. The pumpkin still looks "from scratch" but the geometry is already worked out.
Intermediate — Pattern-Based Faces
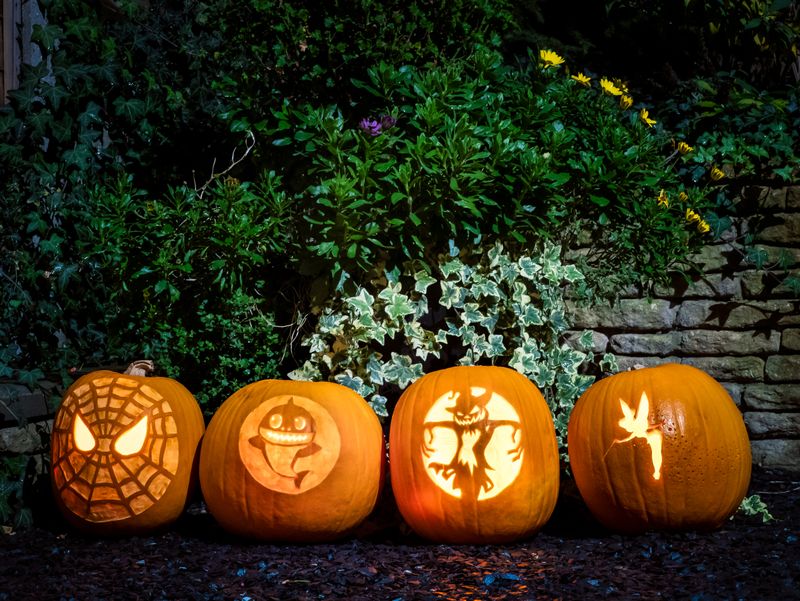
Buy a pattern book (Lichtenstein's "Pumpkin Masters" line, or print free patterns from Better Homes & Gardens online). Tape the pattern to the front of the pumpkin, use a poker to dot the outlines all over, then remove the paper and saw along the dotted lines. This works for cat faces, ghosts, spider webs, and elaborate expressions.
Intermediate carvers also start experimenting with depth: shaving skin off the outer rind (without cutting through) lets light bleed through in a soft glow rather than a sharp edge.
Advanced — Multi-Pumpkin Sculptures and Shaving
Once you have three or four experienced carvers, set a challenge: each person creates an entire scene across two pumpkins — a black cat and full moon, a raven on a pumpkin "branch," a witch in profile. Advanced carvers use clay-shaping tools to remove layers of rind without puncturing, creating gradients of light. Some use a cookie-cutter-and-mallet method (lightly tap a cookie cutter into the rind for a perfect circle of cut pumpkin) for clean shapes — great for polka-dot patterns.
The Food That Goes With It
Pumpkin carving inevitably gets the kitchen messy. Plan food that is handheld, pre-portioned, and not too difficult to eat with one hand while holding a pumpkin carving tool in the other.
Finger Foods
- Roasted pumpkin seeds: do not throw those guts away. Wash the seeds, dry them, toss with olive oil and salt, and bake at 300°F for 30 minutes. Set out small bowls for guests to snack on while carving. Bonus: it dramatically reduces carving mess because guests graze instead of making extra dishes.
- Mini grilled cheese sandwiches: cut into quarters, served warm from a baking sheet
- Carrot and celery sticks: with hummus and ranch dip — bright colors pop against the orange pumpkins
- Apple slices with peanut butter: balance the savory carving energy with a sweet option
- Pumpkin-shaped cheese balls: cream cheese mixed with shredded cheddar, rolled in a ball, scored with a paring knife to look like a mini pumpkin, with a pretzel rod inserted as a stem
- Popcorn in paper cones: cheap, kid-friendly, and the orange-and-brown color matches the theme
- Spooky-shaped sandwiches: use a bat or pumpkin cookie cutter to cut bread, fill, and serve open-faced on a tray
The Main Dish Options
If you want a real meal after carving, the obvious pairing is chili. A pot of hearty beef or vegetarian chili with cornbread works because the spices are warming, the ingredients are inexpensive, and any leftover chili can be repurposed for nachos on game day. A soup-and-bread bar (pumpkin soup, tomato soup, butternut squash soup) keeps things seasonal and lets picky eaters pick their favorite.
Sweets — Pumpkin Everything
- Pumpkin pie: a classic, especially for adult guests who want a non-candy dessert
- Pumpkin spice cookies: pre-made or from a box mix. Frost with orange and black icing for visual punch.
- Candy pumpkin pyramid: layer candy corn, mellowcreme pumpkins, and candy eyeballs in a clear vase — visually striking, easy to refill
- Spider cookies: chocolate cookies with pretzel-stick legs inserted before baking
- Caramel apples: serve with a topping bar of chopped nuts, sprinkles, and crushed Oreos
Drinks for a Fall Evening
For an adult party, set up a hot drink bar: cider (regular or spiked with bourbon and cinnamon), mulled wine, hot cocoa with marshmallows, and coffee with pumpkin spice syrup. For kids, serve apple cider, hot chocolate, and spooky green smoothies (made by blending spinach with pineapple — looks weirdly cool). For everyone, keep plenty of water and a flavored seltzer on hand; carving is thirsty work and most people underestimate how much they'll drink.
 Games, Activities, and the "Pumpkin Olympics"
Carving alone takes 30–45 minutes per pumpkin, but the party lasts longer than that. Build in 60–90 minutes of structured activity beyond carving so energy stays high and no one feels rushed.
The Pumpkin Olympics — Six Friendly Competitions
- Scoop sprint: who can clean out a pumpkin the fastest? Use a kitchen scale — cleanest pumpkin wins.
- Best face: vote on the best carved face with paper ballots. Categories include Scariest, Funniest, and Most Creative.
- Pattern challenge: provide a stack of patterns, give each person the same one, see who can carve the most accurate copy.
- Pumpkin bowling: line up 10 small "pins" (toilet paper rolls work) and use a small pumpkin as a bowling ball. Loud, silly, kid-approved.
- Seed-spitting contest: who can spit a pumpkin seed the farthest? Outside only. Outdoor safety rules apply.
- Pumpkin trivia: questions on pumpkin history, Halloween culture, autumn traditions. The person who scores highest wins a pumpkin-shaped treat bag.
Activities for Younger Children
Younger kids lose interest in carving quickly. Have a parallel set of "no-knife" activities at the same table:
- Decorate with markers: give them paint pens and let them draw faces on the pumpkin without carving
- Sticker pumpkins: foam or paper pumpkins, decorative stickers, googly eyes, and felt pieces
- Glue and glitter: Mod Podge, paint brushes, and glitter to turn small pumpkins into sparkly decor
- Story time: read "It's the Great Pumpkin, Charlie Brown" or "The Little Old Lady Who Was Not Afraid of Anything" while older kids carve
Activities for Adults Who Want a Break
Adults at an evening pumpkin carving party often appreciate a quieter adjacent activity — wine tasting, dessert tasting, or just a couch area with good fall music. Set the carving table in the kitchen or dining room, then create a "second zone" in the living room where finished cars are on display and adults can chat, sip, and snack. The two zones keep the energy balanced.
Setting the Scene — Decor and Table Styling
The decor should be warm, low-fuss, and easy to clean. Orange, black, deep red, mustard yellow, and cream tones work best. Avoid plastic Halloween decor aimed at kids (skeletons, ghosts) unless your guests are kids.
The Table Setup
Use a kraft paper or butcher paper tablecloth — wide rolls are inexpensive at restaurant supply stores. With markers, guests can doodle on the table while they wait. This becomes a natural conversation starter and a fun memory keepsake. Layer it with a fall-colored runner and cloth napkins in burgundy or gold.
For the centerpiece, skip the standard cornucopia. Instead, line up the finished pumpkins along the table as a natural centerpiece once the carving is done. Add battery candles between them and small bowls of caramel apples or candy corn for height variation.
Lighting
Use string lights overhead, battery candles on every surface, and a couple of small lamps with warm bulbs. The room should be dim enough that carved pumpkin faces glow brightly even with battery tealights inside — that's the visual magic of the night. If you have a chandelier or pendant light, dim it via the dimmer switch.
Music
Build a playlist around the vibe — not Halloween-specific (avoid trick-or-treat songs and screams). Acoustic fall covers, jazz standards, light classical, indie folk (Bon Iver, Iron & Wine, Hozier), and Bossa nova. Save the spookier songs for the second half of the evening when lighting the pumpkins becomes the main activity.
Planning Timeline — From Empty Kitchen to Carved Porch
Two Weeks Before
- Send invitations (paper or digital)
- Buy carving kits, candles, supplies
- Order paper plates and napkins (look for fall-toned designs)
- Print patterns if using them
- Plan the menu and shop for non-perishables
Three Days Before
- Buy pumpkins — let them cure uncovered in a garage or cool shed
- Prep any food that holds well (chili, dips, cookie dough, pie crust)
- Clean the kitchen and dining area more deeply than usual
- Set up chairs and tables if you have a separate carving area
Day Before
- Thaw and prep any frozen items
- Carve two pumpkins yourself so the first-timers have reference points
- Set up the carving stations (one tool kit per 2 people, paper towels, scoops)
- Pre-place beverages and a snack bowl
Day Of
- 3 hours before guests arrive: prep chili, set up music, light candles, place decor
- 1 hour before: prep hot drinks, lay out food, set the carving stations with extra supplies
- 30 minutes before: open wine, slice apples, set out cocktail napkins
- When guests arrive: brief them — "tools here, food there, take a pumpkin" — and let them dive in
Sample Budgets by Group Size
- Family of 4 (no external guests): $40 — 4 pumpkins ($20), 1 carving kit ($10), hot cocoa and apple cider ingredients ($10). An inexpensive, warm night in.
- 8 guests (friends and kids): $90–$130 — 8 pumpkins ($45), 2 carving kits and extras ($25), chili and toppings for 10 ($30), apple cider and snacks ($15), candles and decor ($15).
- 20 guests (class or larger gathering): $250–$400 — 24 pumpkins ($120, on sale), 8 carving kits ($80), chili for 25 ($50), drinks and snacks ($50), paper tableware ($30), lights and decor ($30).
Save money by buying pumpkins the week of the party (when farmer's market prices drop), borrowing carving tools from friends, and skipping paper plates in favor of regular plates and a one-pot chili that cleans up easily.
Variations on the Theme
Glow-in-the-dark pumpkin carving: paint the inside of the pumpkin with glow-in-the-dark acrylic paint before carving. The light bleeds through with extra color.
"No carve" party: cover the table with decoupage materials (tissue paper, Mod Podge, paint pens) for a craft party that produces beautifully decorated pumpkins without any knives. Perfect for kids under 10 or adults who want a less messy night.
Carving-and-painting party: half the table carves, half paints. This dual approach lets everyone participate even if some guests are squeamish about knives.
Front-porch display night: at the end of the party, all guests take their carved pumpkin to your front porch for an impromptu "pumpkin viewing." Photograph the result. Many guests love this so much they offer to do it again next year.
FAQ — Common Questions
When is the best time to carve pumpkins so they last through Halloween?: Carve 1–4 days before Halloween for the freshest look. Pumpkins carved more than a week in advance typically start to dry and brown at the edges. Wait until October 27–30 for a Halloween-night display.
How do I keep carved pumpkins from rotting fast?: After cleaning, soak the carved pumpkin in a 10:1 water-to-bleach solution for several hours, then let it air dry. Reapply bleach spray every couple of days. Petroleum jelly on the cut edges slows moisture loss. Refrigerating the pumpkin overnight extends its life further.
Can very young kids participate safely?: Yes, with no-knife activities like marker decoration, sticker art, or pre-cut peel-and-stick patterns. For ages 6–8, use pumpkin carving tools designed for kids (serrated plastic saws) under close adult supervision. For kids under 6, paint and decorate instead of carve.
What do I do with the seeds and pulp?: Seeds are a delicious snack when roasted. The pulp can be added to soup, composted, or thrown away. If you have chickens or backyard wildlife, both are perfect treats.
How many pumpkins should I buy per person?: One per person for casual carving. Two per person if you want each guest to make a small and a large. Three per person for very skilled carvers or ambitious displays.
What if my guests don't know how to carve?: Pre-print simple patterns, demonstrate the basic technique, and reassure them that no pumpkin looks "bad" — they're all fun. The simplest face looks great lit up at night, even if the cuts are slightly crooked.
Can I host this party in an apartment?: Absolutely. Cover a kitchen island or large dining table with kraft paper, set up trash bags nearby, and you're set. The activity itself is contained, and most people appreciate a contained activity. Cooking smells and pumpkin residue are easier to manage than a full dinner party. Just confirm your building allows battery candles (most do).
What if it rains on party night?: Move everything indoors. The kraft paper tablecloth is forgiving of carpet if you tape it down firmly. Have backup indoor seating planned. Pumpkin carving is one of the few party themes that translates 1:1 from outdoors to indoors without much adjustment.
Wrapping Up
A pumpkin carving party is the rare autumn event that combines creativity, food, a tangible take-home decoration, and a beloved seasonal ritual — all for a modest budget. The key to a great night is preparation: solid tools, dry pumpkins, a covered table, a clear activity plan, and food that supports the carving rather than competing with it. Once you've hosted one, you'll likely make this an annual tradition.
For tableware that pulls the whole look together, browse our Halloween party supplies collection and our fall party plates and napkins. Wishing you a perfect October and a porch full of glowing pumpkins!